Thread: Building A looper Beast

  1. #41
    Team Member R Austin's Avatar
    Join Date
    Aug 2005
    Location
    ludington Michigan
    Posts
    250
    Post Thanks / Like

    Default

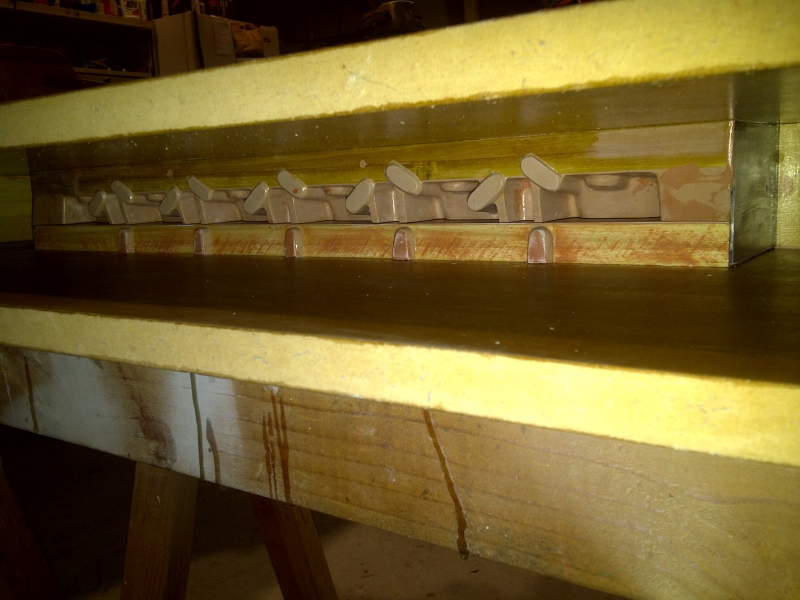
    The following group of pics will complete the pattern for the mid case casting. The first pic is the crank side pattern turned over exposing the side with cheek patterns and the block side stack up laid in position for gluing to the block side board. Pic #6 is the block side board, which is removable to allow the release of the cheek sand parts, turned over, exposing the underside with the boards from pic #1 glued in position. The last 4 pics are the mold closed up and looking into the sides that produce the cheeks for the sides of the casting. The circle impressions and half circle mounds in the face and on parts of the patterns are alignment points for the sand parts to set in the correct position when assembled for the pour. The under side of the block side pattern has split circles because the separator board is missing when the sand is set. The moving of the side cheek sand together brings the half circles full for alignment. That separator board was the hard part to the development of this pattern. Each time I had to remind myself that the part of the pattern between the top and bottom was 3/4" to wide and the cross section of the part would be OK in critical areas when in the cast position.Name:  IMG-20120208-00320.jpg
Views: 2847
Size:  320.9 KBName:  IMG-20120208-00321.jpg
Views: 2855
Size:  338.4 KBName:  IMG-20120211-00326.jpg
Views: 2792
Size:  334.6 KBName:  IMG-20120211-00327.jpg
Views: 2867
Size:  331.7 KBName:  IMG-20120226-00331.jpg
Views: 2761
Size:  338.7 KBName:  IMG-20120226-00335.jpg
Views: 2793
Size:  324.1 KBName:  IMG-20120228-00336.jpg
Views: 2738
Size:  333.5 KBName:  IMG-20120228-00337.jpg
Views: 2822
Size:  376.0 KBName:  IMG-20120228-00339.jpg
Views: 2775
Size:  325.8 KBName:  IMG-20120228-00340.jpg
Views: 2753
Size:  333.6 KB

  2. #42
    Team Member R Austin's Avatar
    Join Date
    Aug 2005
    Location
    ludington Michigan
    Posts
    250
    Post Thanks / Like

    Default

    For those of you that do not visit the Quincy thread, here is a phone video clip form 9/7 when I ran my 60 inch Looper at Hillsdale Mi. Just think what a 100 inch will do on the 15' Jones cabover.


    https://www.youtube.com/watch?v=NNPxRvdAusA

  3. #43
    Team Member
    Join Date
    Nov 2008
    Location
    Horseshoe Bend, ID
    Posts
    657
    Post Thanks / Like

    Default

    Thanks again for traveling to Hillsdale and providing such a wonderful, nostalgic show. That shriek still sends chills up my spine.
    Please keep posting images as your project progresses. Your 100 CID Beast will likely need a stiffer wheel.......

    Tim

  4. #44
    Team Member R Austin's Avatar
    Join Date
    Aug 2005
    Location
    ludington Michigan
    Posts
    250
    Post Thanks / Like

    Default

    That completes the major castings for the project. I had to make a lower starter bracket for the TIIX front cover also. Three other castings have been identified that will be required and those are for the coil holders on the heads, a new top main bearing cap and an adapter for the power head to tower housing. The Jones tower housing is so short that the unit is set bad to clear the water pump housing. This moves the lower carb back over the swivel pin and because Merc did not offset the reed assemblies upward the bottom carb will not clear. So the need for an adapter to raise the powerhead to clear. Those patterns have been completed. So another trip to the foundry is required. The following pics are of the castings from the patterns that have been viewed so far. Enough parts to do 2 engines with exception of the billet block. The next block will be cast. The drawings have been completed for the cylinder core box . I will work on the block patterns this Fall? Well maybe winter.
    Name:  IMG-20120421-00409.jpg
Views: 2592
Size:  368.0 KBName:  IMG-20120421-00410.jpg
Views: 2605
Size:  356.5 KBName:  IMG-20120421-00411.jpg
Views: 2583
Size:  360.1 KBName:  IMG-20120421-00412.jpg
Views: 2565
Size:  381.4 KBName:  IMG-20120421-00413.jpg
Views: 2569
Size:  358.6 KBName:  IMG-20120421-00414.jpg
Views: 2562
Size:  356.9 KBName:  IMG-20120421-00415.jpg
Views: 2545
Size:  365.0 KBName:  IMG-20120421-00416.jpg
Views: 2608
Size:  325.9 KB

  5. #45
    Team Member R Austin's Avatar
    Join Date
    Aug 2005
    Location
    ludington Michigan
    Posts
    250
    Post Thanks / Like

    Default

    Over the last couple of weeks I have bee able to complete 2 heads. The end head, which serves as both top and bottom heads and the middle head. I made new cutter bits for my fly cutter to be able to cut 71/4" wide parts which will take care of all surfaces of the engine. This pair of heads are just test parts to again check all clearances and section thicknesses. The test heads were not heat treated and the finish reflects that. I have started cutting the mid case which is heat treated and what a difference in the cutting and finish. Having access to a laser is a great help. As you can see in the pic, I made a fixture for holding the heads for drilling and tapping the spark plug holes. It took less time to design, make laser cut files and weld together, than too readjust the mill head for the plug angle.Name:  IMG-20120921-00665.jpg
Views: 2514
Size:  149.7 KBName:  IMG-20120921-00666.jpg
Views: 2441
Size:  161.8 KBName:  IMG-20120921-00667.jpg
Views: 2486
Size:  132.3 KBName:  IMG-20120921-00670.jpg
Views: 2451
Size:  112.7 KBName:  IMG-20120921-00671.jpg
Views: 2423
Size:  114.2 KBName:  IMG-20120922-00674.jpg
Views: 2471
Size:  125.9 KBName:  IMG-20120922-00675.jpg
Views: 2397
Size:  194.1 KBName:  IMG-20120922-00676.jpg
Views: 2507
Size:  181.3 KBName:  IMG-20120923-00687.jpg
Views: 2468
Size:  173.6 KBName:  IMG-20120923-00688.jpg
Views: 2418
Size:  152.3 KB

  6. #46
    Team Member R Austin's Avatar
    Join Date
    Aug 2005
    Location
    ludington Michigan
    Posts
    250
    Post Thanks / Like

    Default

    The heads as finished met the goal of a 21CC combustion chamber. Three fixtures were required for the heads. One to locate the chambers for positioning the two 1/4" pilots holes for cutting chambers and drilling head bolts. One to turn the head in the lathe, centering on the pilot hole, to radius the edge of the combustion chamber and the one to cut the plug holes.Name:  IMG-20120923-00689.jpg
Views: 2492
Size:  168.9 KB

  7. #47
    Team Member Gene East's Avatar
    Join Date
    Dec 2004
    Location
    Quincy, IL
    Posts
    593
    Post Thanks / Like

    Default

    Perhaps you should give the foundry a plug. Those are some beautiful castings!

  8. #48
    Team Member BJuby's Avatar
    Join Date
    Aug 2011
    Location
    Cold Spring, NY
    Posts
    256
    Post Thanks / Like

    Default

    Reason for 2 plugs per cylinder? Also what ignition system will drive that setup? Unless I am missing something here that's 12 spark plugs.

  9. #49
    Team Member R Austin's Avatar
    Join Date
    Aug 2005
    Location
    ludington Michigan
    Posts
    250
    Post Thanks / Like

    Default

    Two plugs for redundancy. Less loss of power with a fouled plug than a dead cylinder. That is why piston aircraft engines have dual plugs. The Mercury ADI system will fire 2 plugs. Add an extra coil, wired in series with the standard coil. The primary circuit will charge both coils. That is all any dual output coil is, a single primary winding with two secondary windings. I have seen on the net "Hi Performance" outboards with dual plugs and the coils wired parallel. That will only fire one plug, the one with the least resistance to fire or the least resistance thru the primary winding. I spent a week in the early 80's at Merc outboard school, the system was new at the time. They had a test board set up, flywheel driven by electric motor, the first thing a friend of mine and I did was, at break when there was no one around, was to rewire and test the system with dual coils. Tested both wired in series and parallel. Only wired in series worked!

  10. #50
    Team Member
    Join Date
    Jul 2012
    Posts
    65
    Post Thanks / Like

    Default

    Land and Sea dule plug heads from the 80's for the V6. Just used 2 set of 6 coils. Ign worked fine,the heads would crack!
    Power gain? Never had the fire go out,so the Ign worked.

Thread Information

Users Browsing this Thread

There are currently 115 users browsing this thread. (0 members and 115 guests)

Similar Threads

  1. Legendary Dub Parker's B Looper found!
    By Original Looper 1 in forum Outboard Racing History
    Replies: 6
    Last Post: 07-25-2022, 06:16 PM
  2. Quincy Looper Pictures and Collections
    By Original Looper 1 in forum Outboard Racing History
    Replies: 71
    Last Post: 01-21-2008, 04:26 PM
  3. Waldman F 44 Looper has been found!
    By Original Looper 1 in forum Outboard Racing History
    Replies: 26
    Last Post: 06-18-2007, 09:55 AM
  4. Quincy's 90 ci King Looper Beast
    By Original Looper 1 in forum Outboard Racing History
    Replies: 1
    Last Post: 04-06-2007, 07:08 AM

Bookmarks

Posting Permissions

  • You may not post new threads
  • You may not post replies
  • You may not post attachments
  • You may not edit your posts
  •